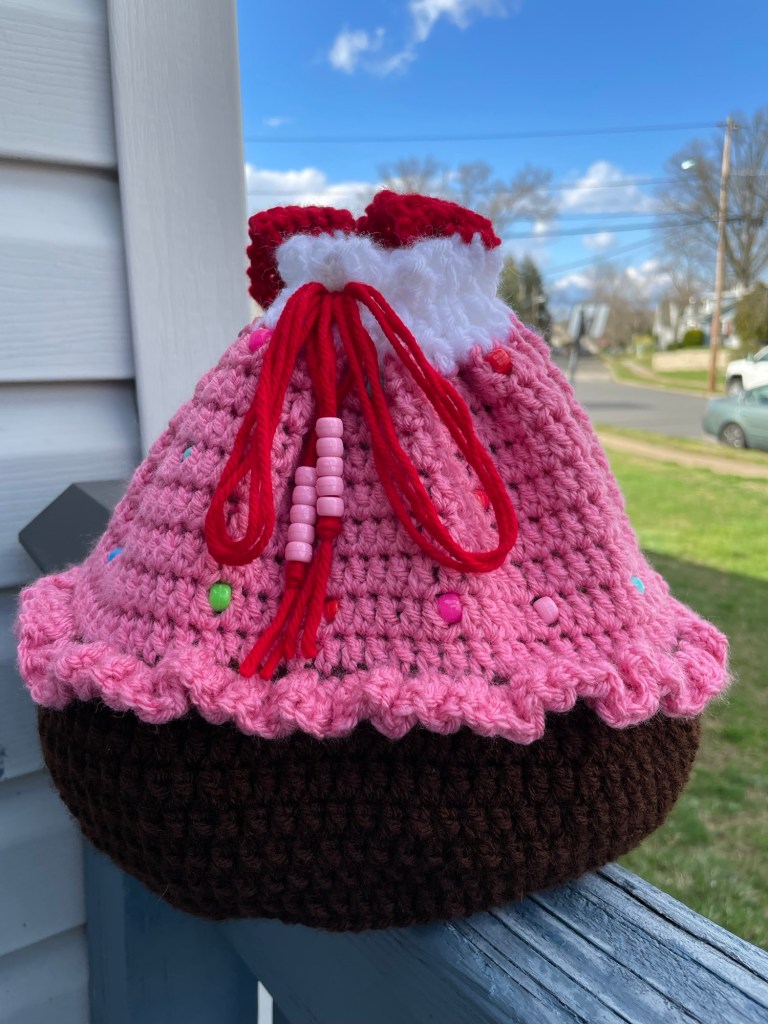
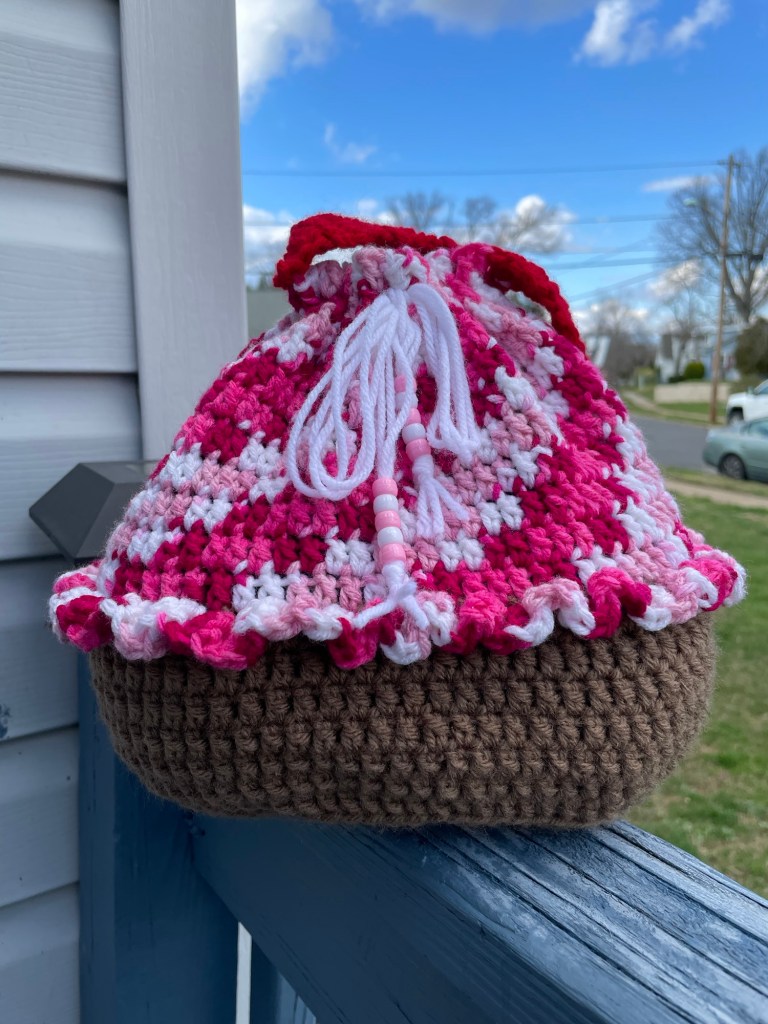

Crochet Cupcake Purse
Pattern by: Taralynn Dulo

Materials Needed:                                                                                                            * Size H or 5mm crochet hook
* Worsted Weight Yarn (size 4)
 * I used these colors but feel free to use any worsted weight yarn:
 * Redheart SuperSaver in the color Café Latte
 * Redheart SuperSaver in the color White
 * Walmart Mainstays Yarn in the color Multi Pink
 * Joanns Big Twist Value Yarn in the color Deep Red                                                        * Scissors                                                                                                                            * Tapestry Needle
* Measuring Tape
* Stitch Markers

Optional Materials
* Pony beads                                                                                                                      * Decorative Beads
* Letter beads

Stitch Abbreviations
* Ch - chain                                                                                                                        * St - Stitch
* Sl St - Slip Stitch
* Sc - Single Crochet
* Dc - Double Crochet
* Dcblo - Double Crochet Back Loop only
* Dcflo - Double Crochet Front Loop only

Notes                                                                                                                                  * Chain 2 at the start of each row does not count as a stitch
* Written in US terms
* Bag is worked from the bottom up
* First yarn color will be the color of your cupcake wrapper
* Stitch counts are at the end of each round
* I recommend using a stitch marker to mark the start of each round

Crochet Cupcake Purse Pattern:
To Start: Ch 3, Sl St into the first chain
Round 1: Ch 2, work 12 Dc into circle, Sl St to the beginning of chain (12)
Round 2: Ch 2, work 2 Dc in each st, Sl St into beginning chain (24)
Round 3: Ch 2, work 1 Dc in the first st, *2 Dc in the next st, 1 Dc in next st
repeat from * around your circle, Sl St into beginning ch (36)
Round 4: Ch 2, work 1 Dc in the first two st, *2 Dc in the next stitch, 1 Dc in
the next two st, repeat from * around, Sl St into beginning ch (48)
Round 5: Ch 2, work 1 Dc in the first three st, *2 Dc in the next st, 1 Dc in the
next three St, repeat from * around, Sl St into beginning ch (60)
Round 6: Ch 2, work 1 Dc in the first four st, *2 Dc in the next st, 1 Dc in the
next 4 st, repeat from * around, Sl St into beginning ch (72)
Round 7: Ch 2, work 1 Dc into the first five st, *2 Dc in the next st, 1 Dc in next
5 st, repeat from * around, Sl St into beginning ch (84)
Next, you will be continuing to work in a circle but now you’re working up
the sides of your bag
Round 8: Ch 2, work 1 Dcblo in each st around, Sl St into beginning ch (84)
Rounds 9-14: Ch 2, work 1 Dc in each st around, Sl St into beginning ch (84)
Change yarn to your cupcake color!
Round 15: with your new/cupcake color, attach new color and secure to
your work, ch 2, Work 3 Dcflo In each st around, Sl St in the beginning ch,
tie off yarn, and sew in end. (252)

Now before you attach your cupcake color for Round 16, if you want to add pony
beads into your work, this is where you would do so. If you decide to add beads,
you simply string 25 to 30 beads of your color choice onto your yarn. (I use regular
sized pony beads.) Then as you work rounds 16 – 24 you drop and work the beads
into your work.

Round 16: attach cupcake yarn color to Back Loop, Ch 2, work 1 Dcblo in
each BACK LOOP around, Sl St in the beginning ch (84)

Rounds 17-23:(if you’re adding beads, drop them into your work as you work
up these rounds!) Ch 2, work 1 Dc in each st around,Sl St in the beginning
ch (84)

Change to white for the whipped cream

Rounds 24-26: Ch 2, work 1 Dc in each st around,Sl St in the beginning ch
(84) Finish off, and sew in your ends.

Cupcake Purse Handle:
Note: keep in mind that the handle will stretch with use

With same color yarn as your cupcake color or coordinating yarn color:
Start at the first St of Round 26 and count to the 19th St, Sl St yarn to
attach handle color,

Row 1 of handle: Ch 2, 1 Dc in same st, then 1 Dc in the next four St, Ch 2 and
turn (5)
Rows 2-39: 5 Dc, Ch 2, turn work (5)

Repeat until desired length, for this pattern I made my handle around 20
inches which is 39 rows When you’re finished, don’t tie off!

Starting back on Round 26, count from the 23rd stitch on your bag (last st
of where your handle was attached), to the 61st St, Sl St handle onto this st,
Ch 1, Sc in the same st and the next four St to attach handle to the other
side of your bag. (These sc will be attached over stitches 61-65) on the top
of your bag.)

Drawstring Closure:
With yarn color of your choice: Use 3 strands of worsted weight acrylic yarn
around 60 inches in length. Start from the front center of your bag, 2nd row
from the top of your bag, weave the 3 strands of yarn held together in and
out in between 2 stitches at a time all around your bag.

I like to add pony beads to my yarn strands for an extra touch. You can
also use letter or decorative beads. I triple knot my strands below the
beads or without the beads to secure the strands. Make sure your
drawstring is even all around your bag, and trim to your liking.

Sew in ALL of your ends.

Thank you so much for choosing to make my pattern. I hope that you enjoy
making it! Thank you so much for all of your love and support of my work.
Please contact/reach out to me at allyarnedup83@gmail.com or on my instagram @all.yarned.up if you have any questions, need help with the pattern, or just have any general questions about crochet.

Have a Wonderful Day!

Your Friend, Taralynn Dulo
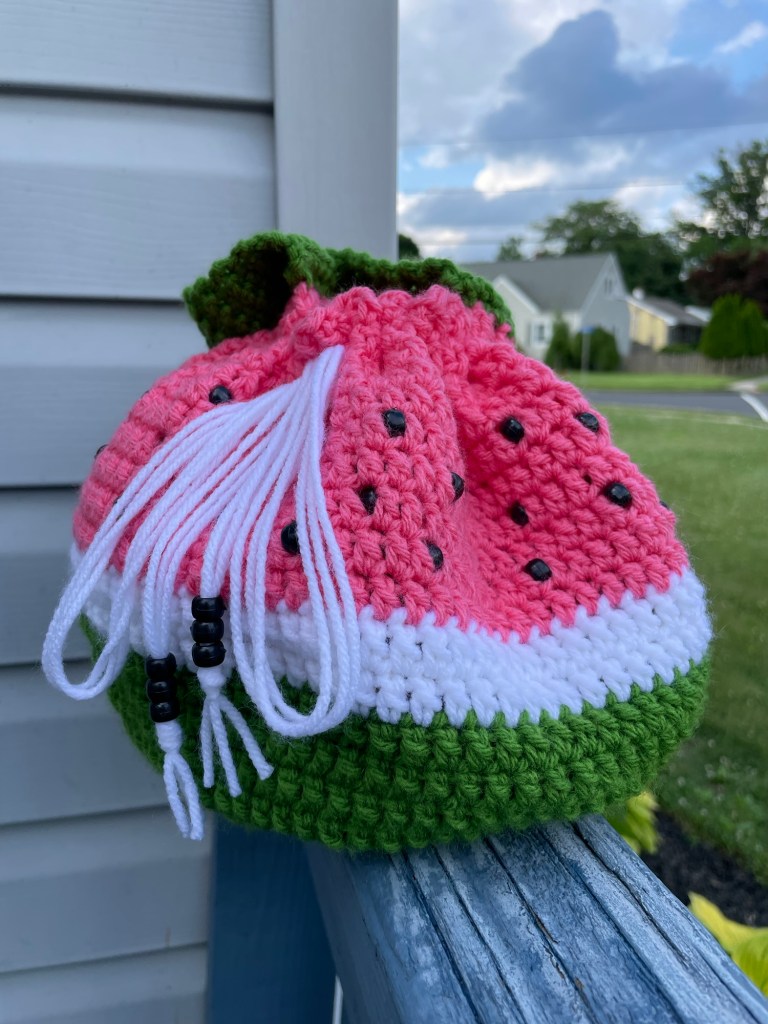
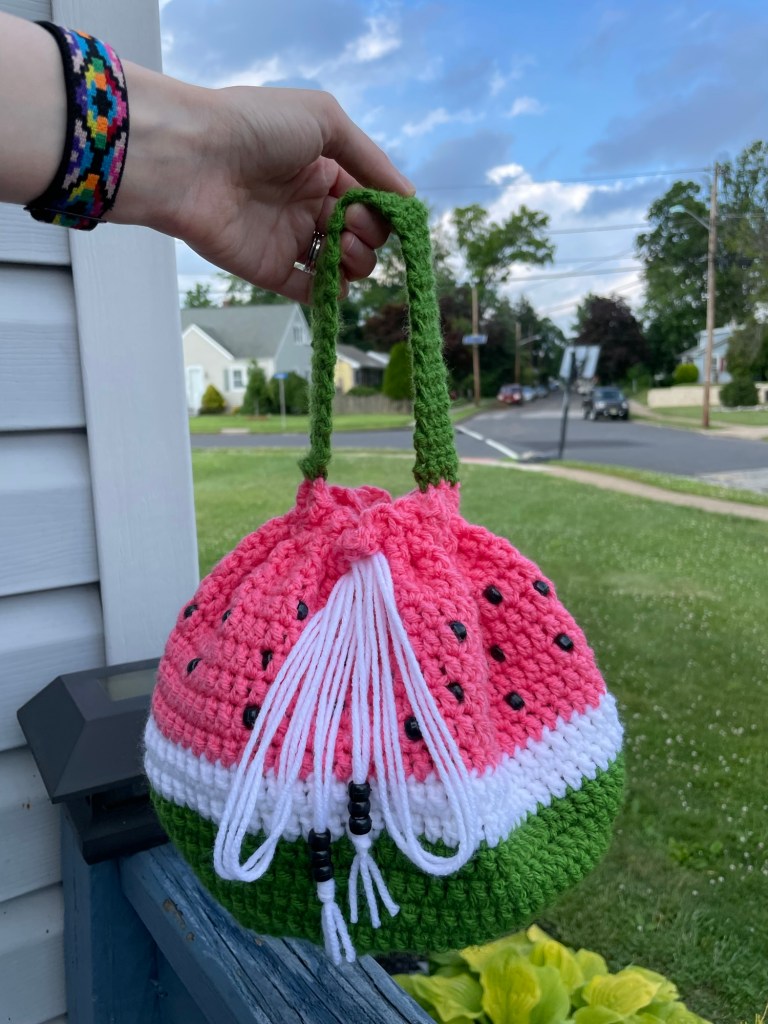
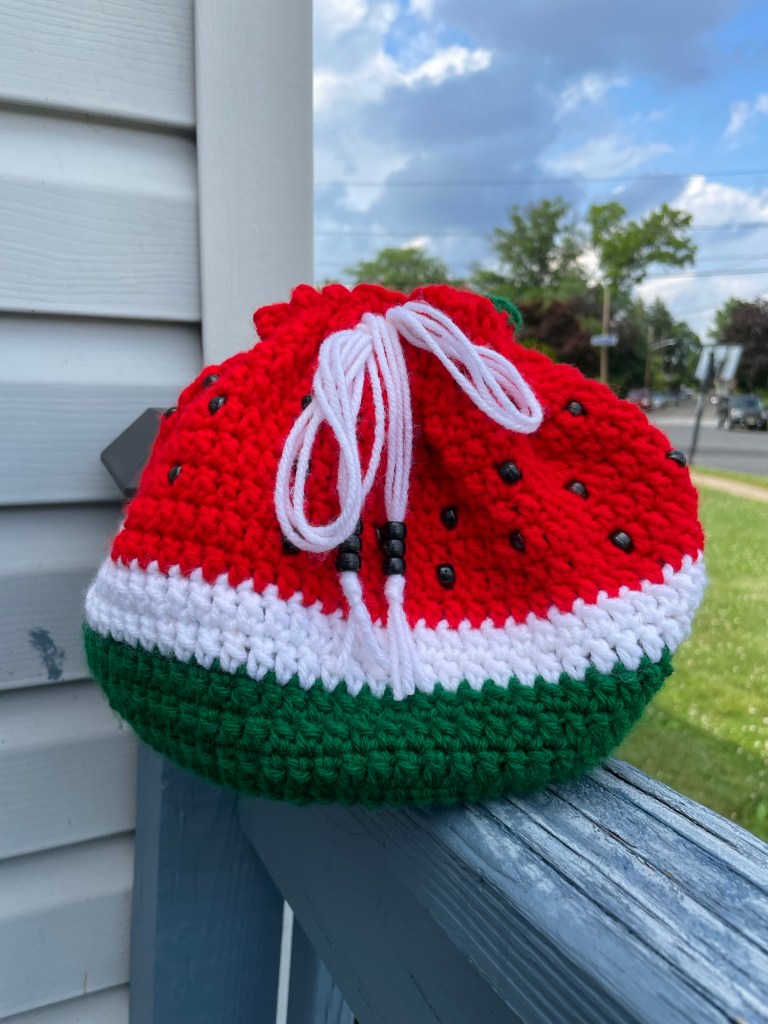
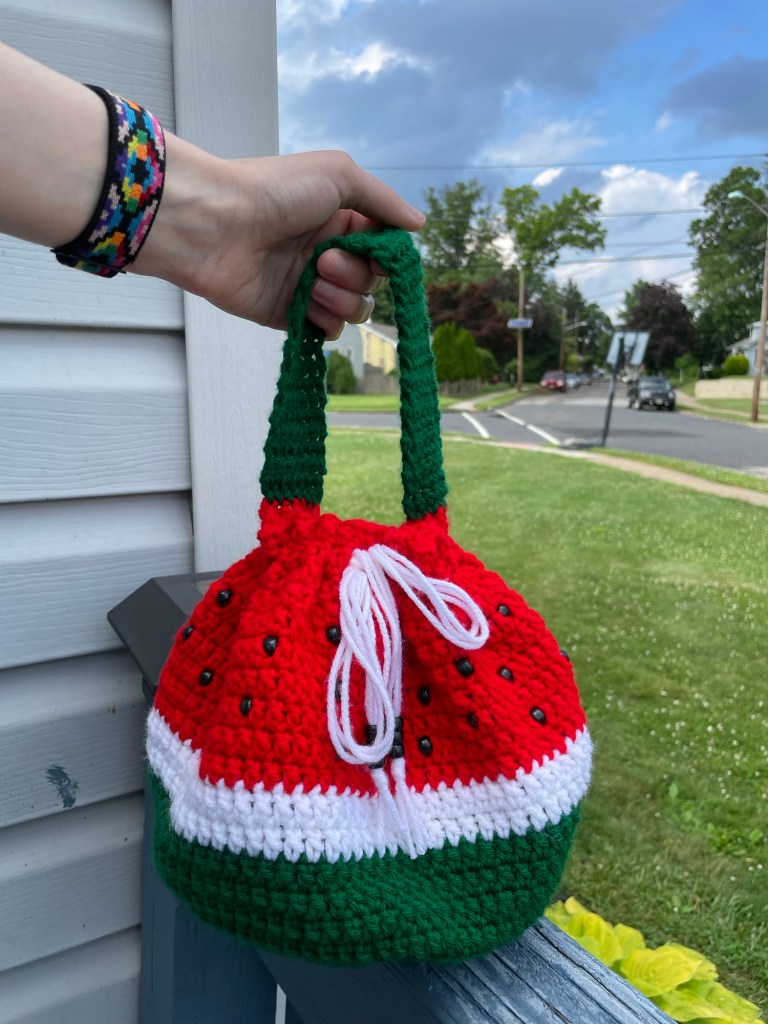
Crochet Watermelon Purse
Pattern by:Taralynn Dulo

Materials Needed:
* Size H or 5.00mm crochet hook
* Worsted Weight Yarn (size 4)
 * I used these colors but feel free to use any worsted weight yarn:
 * Joanns Big Twist Value Yarns:
  * Varsity Red
  * Varsity Green
  * White
  * Scissors
* Tapestry Needle
* Measuring Tape
* 56 Black Pony Beads
* Stitch Markers

Stitch Abbreviations
* Ch-chain                                                                                                                          * St - Stitch                                                                                                                        * * Sl St- Slip Stitch
* Sc- Single Crochet
* Dc-Double Crochet
* Dcblo- Double Crochet Back Loop only

Notes
* Chain two to start each round never counts as a stitch
* Bag is worked from the bottom up
* Written in U.S. Terms
* Stitch counts are at the end of each round
* I recommend using a stitch marker to mark the start of each round

Measurements:
* Bottom of the bag (7 ½ inches)
* Bottom to the top of the bag (8 inches)

Crochet Watermelon Purse Pattern:
Make 2 (Starting with Green Yarn)
Ch 3, Sl St into the first Ch
Round 1: Ch 2, 12 Dc into the circle, Sl St to starting Ch (12)
Round 2: Ch 2, 2 Dc into each st, Sl St to starting Ch (24)
Round 3: Ch 2, 1 Dc into first st, *2 Dc in the next st, 1 Dc in the next st,
repeat from the * around the circle, Sl St to starting Ch (36)
Round 4: Ch 2, 1 Dc into the first two st, *2 Dc into the next st, 1 Dc into the
next st, repeat from the * around the circle, Sl St to starting Ch (48)
Round 5: Ch 2, 1 Dc into the first three st, *2 Dc into the next st, 1 Dc into the
next three st, repeat from the * around the circle, Sl St to starting Ch (60)
Round 6: Ch 2, 1 Dc into the first four st, *2 Dc into the next st, 1 Dc into the
next four st, repeat from the * around the circle, Sl St to starting Ch (72)
Round 7: Ch 2, 1 Dc into the first five st, *2 Dc into the next st, 1 Dc into the
next five st, repeat from the * around the circle, Sl St to starting Ch (84)

Attaching:
Hold both circles with wrong sides facing each other. Attach green yarn
with a Sl St.

Round 8: Ch 1, Sc around making sure to pick up both loops on both
circles. Sl St to starting Ch (84)

Next you will be working up the sides of your bag.

Round 9: Ch 2, 1 Dcblo in each st around, Sl St to starting Ch (84)
Rounds 10-12: Ch 2, 1 Dc in each st around, Sl St to starting Ch (84)

Change to white yarn

Rounds 13-14: Ch 2, 1 Dc in each st around, Sl St to starting Ch (84)

Before you attach red yarn, string 50 Black Pony Beads on to your yarn!

Change to red yarn

I worked the first round of red (Round 15) without dropping any pony beads,
I placed ten pony beads in each of Rounds 16-20, using a total of 50 Black
Pony Beads; however, your placement and count of pony beads is up to
you!

Round 15: Ch 2, 1 Dc into each stitch around your circle, Sl St to starting Ch
(84)
*Rounds 16-20 you will be dropping ten Black Pony Beads in each round
spread out.
Rounds 16-20: Ch 2, 1 Dc into each st around, dropping ten Black Pony
Beads. Sl St to starting Ch (84)
Rounds 21-24: Ch 2, 1 Dc into each st around, Sl St to starting Ch (84)

Watermelon Purse Handle:

Keep in mind that the handle will stretch with use.

With color of your choice (I used the same green as in my bag), start at the
first stitch of Round 24 and count to the 19th stitch, Sl St yarn to attach
handle color,
Row 1: Ch 1, Sc into the same st, 1 Sc into the next five st, Ch 1 and turn (6)
Rows 2-35: Sc across, Ch 1 and turn (6) don’t tie off!

Repeat until desired length, I made my handle around 10 inches which is
about 35 rows,

Starting back on Round 24, count from the 23rd stitch on your bag (the last
St where your handle was attached), to the 61st St, Sl St handle onto this St,
Ch 1, Sc in the same St, Sc in the next 5 sts to attach handle to the other side of your bag. (these Sc will be worked in stitches 61-65 on the top of
your bag).

Drawstring Closure:
With yarn color of your choice: use three strands of worsted 4 weight
acrylic yarn around 60 inches in length.

Start from the front center of your bag, 2nd row from the top of your bag,
weave the three strands of yarn held together in and out in between 2
stitches at a time around your bag.

I like to add pony beads to my yarn strands for an extra touch. You can
also use letter or decorative beads. (I used 3 Black Pony Beads on each
string tie for this project.) I triple knot my strands below the beads or
without the beads to secure the strands. Make sure your drawstring is even
all around your bag, and trim to your liking.

Sew in ALL of your ends.

Thank you SO much for choosing to make my pattern. I hope that you enjoy
making it! Thank you so much for all of your love and support of my work.
Please contact/reach out to me at allyarnedup83@gmail.com or on
Instragram @all.yarned.up if you have any questions or need help with this
pattern. If you post finished pictures of your project on Instragram please
tag me so that I can see! Thank you!

Have a Wonderful Day!

Your Friend, Taralynn Dulo
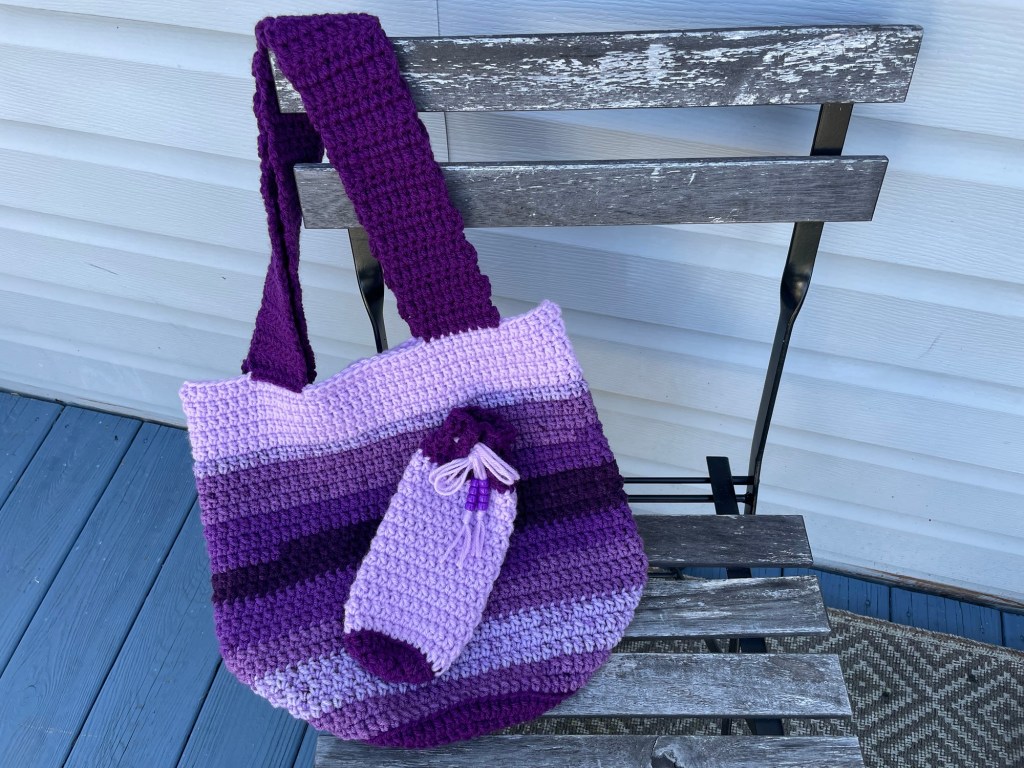
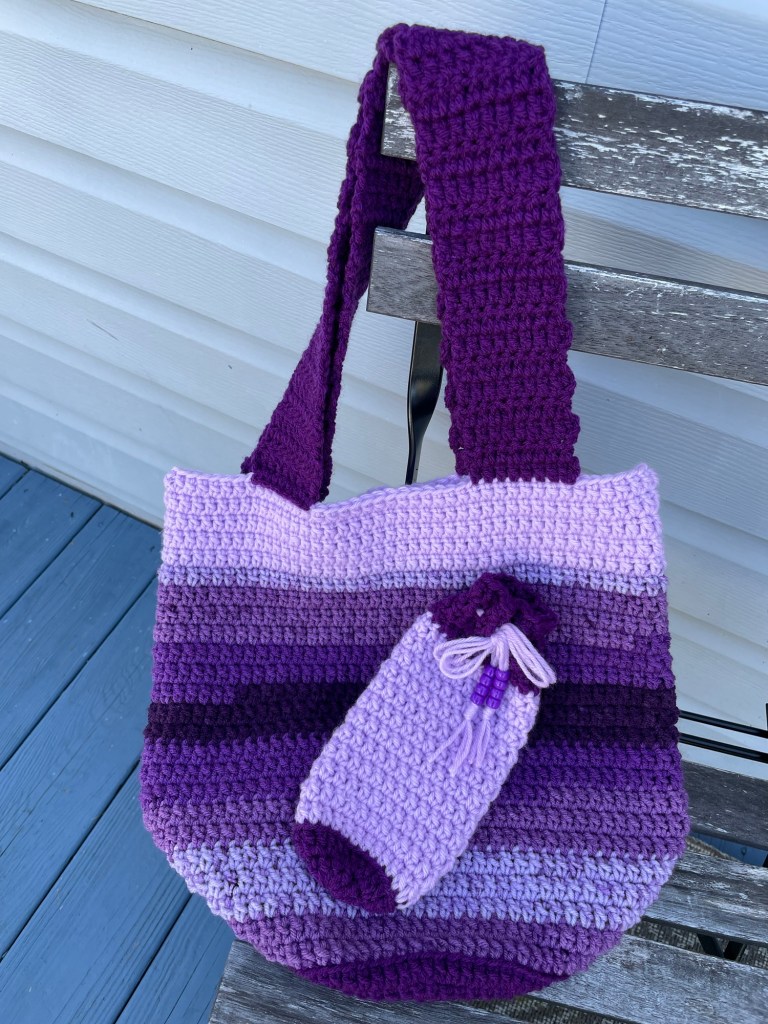
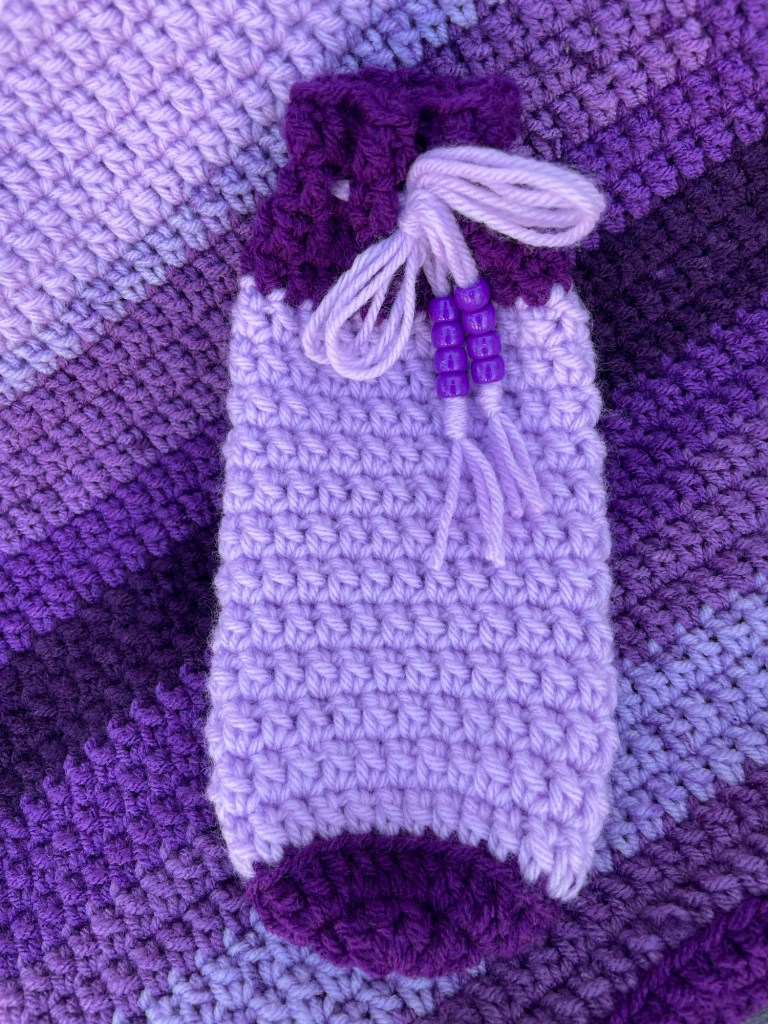

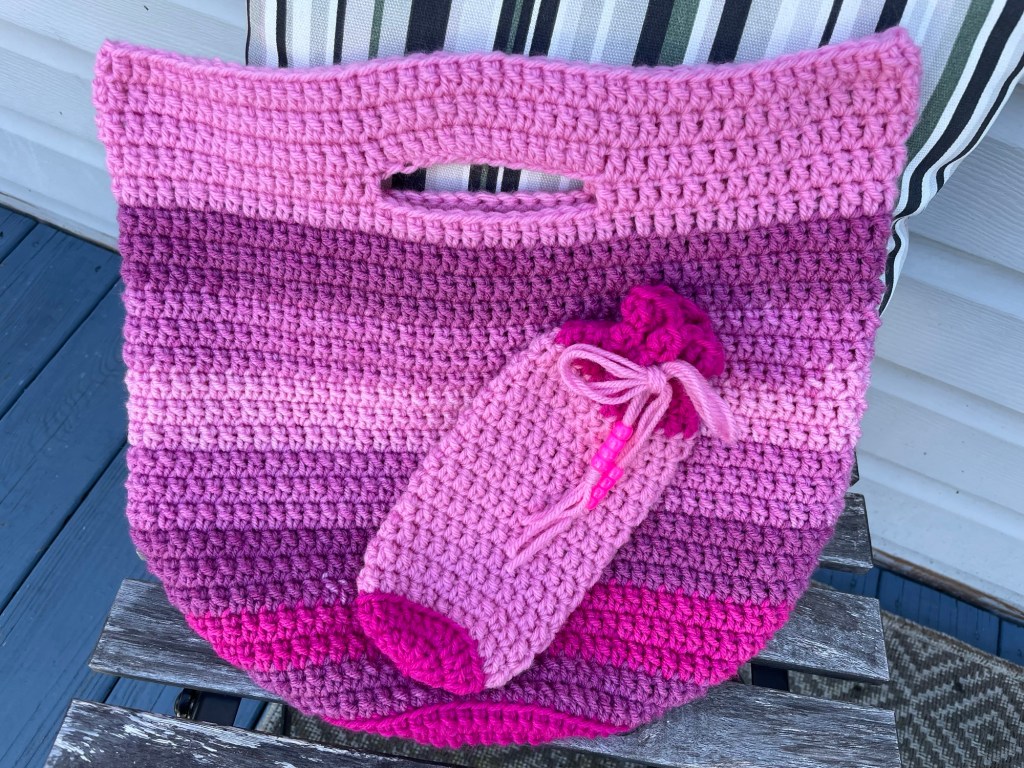
Crochet Tote Bag With Matching Case
Pattern by:Taralynn Dulo
(Includes two Style Handles)


Materials Needed:
* Size H or 5.00mm crochet hook
* Worsted Weight Yarn (size 4)
 * I used these colors but feel free to use any worsted weight yarn:
 **Pink Style Tote Bag
   * Joanns Big Twist Value Yarns: medium rose and magenta
   * Michaels Craft Smart Value Yarn: pink ombre
 **Purple Style Tote Bag
   * Redheart Supersaver Yarn: dark orchid
   * Joanns Big Twist Value Yarn: soft purple
   * Michaels Craft Smart Value Yarn: purple ombre
* Scissors
* Tapestry Needle
* Measuring Tape
* Stitch Markers
* Optional: Pony, Decorative, and or letter beads. Bows, Ribbons, Buttons


Stitch Abbreviations
* Ch-chain
* St - Stitch                                                                                                                        *  Sl St - Slip Stitch
* Sc - Single Crochet
* Dc - Double Crochet
* Dcblo - Double Crochet Back Loop only


Measurements:
** Pink Tote Bag Measurements (including handle)
* Height 12 inches, width 13 ½
* Base measurement: 7 ½ inches
** Purple Tote Bag Measurements:
* Without Handles: height 12 inches, width 13 ½ inches
* Including Handles: height 21 inches, width 13 ½ inches
* Base Measurement: 7 ½ inches
* Case Measurements:
Height 7 inches, Width 4 inches, and base 2 inches


Notes
* Chain two to start each round never counts as a stitch
* Bag and case are worked from the bottom up
* Written in U.S. Terms
* Stitch counts are at the end of each round
* I recommend using a stitch marker to mark the start of each round
* Both tote bags have the same base and body pattern (change in pattern
will come later on for your choice in handle).
* If you want a stronger base for your bag, you can make two base circles
and attach them. This option will be shown and written out in the pattern
(side note: I use my tote bags for light items and single base works good for
me).
***Tote bag isn’t meant for heavy items.***

Pattern: Purple Version
Make 2
Ch 3, Sl St into the first Ch
Round 1: Ch 2, 12 Dc into the circle, Sl St to starting Ch (12)
Round 2: Ch 2, 2 Dc into each st, Sl St to starting Ch (24)
Round 3: Ch 2, 1 Dc into first st, *2 Dc in the next st, 1 Dc in the next st, repeat from
the * around the circle, Sl St to starting Ch (36)
Round 4: Ch 2, 1 Dc into the first two st, *2 Dc into the next st, 1 Dc into the next two
st, repeat from the * around the circle, Sl St to starting Ch (48)
Round 5: Ch 2, 1 Dc into the first three st, *2 Dc into the next st, 1 Dc into the next
three st, repeat from the * around the circle, Sl St to starting Ch (60)
Round 6: Ch 2, 1 Dc into the first four st, *2 Dc into the next st, 1 Dc into the next
four st, repeat from the * around the circle, Sl St to starting Ch (72)
Round 7: Ch 2, 1 Dc into the first five st, *2 Dc into the next st, 1 Dc into the next five
st, repeat from the * around the circle, Sl St to starting Ch (84)


Attaching: (If making 2 for a stronger base) if not skip to round 9
Hold both circles with wrong sides facing each other. Attach green yarn with a Sl
St.


Round 8: Ch 1, Sc around making sure to pick up both loops on both circles. Sl St
to starting Ch (84)


Next you will be working up the sides of your bag.


Round 9: Ch 2, 1 Dcblo in each st around, Sl St to starting Ch (84)
Rounds 9-26: Ch 2, 1 Dc in each st around, Sl St to starting Ch (84)


Attach new yarn color.

Round 27: Ch 2, 1 Dc in each st around, sl st into beginning Ch (84).
Rounds 28 – 31: Ch 2, 1 Dc into each stitch around the circle, sl st into beginning Ch
(84).


Tie Off and Weave In Your Ends!

Tote Bag Handles:
Lay your bag flat with back of bag facing towards you, center
starting stitch in the middle, evenly place stitch markers, one on left, one on right
sides of the bag.


Row 1: Count in from right stitch marker to 7th st, attach yarn, Ch 2, 1 Dc in first st, 1
Dc in the next 7 sts, Ch 2, turn,
Row 2: 1 Dc in each st across (8),
Repeat row 2 until you have an approximately 22 inch handle,
To attach: skip over 14 stitches, attach to same side of bag, sc to bag to attach.


Tie Off Handle and Weave In Your Ends!


Now turning your bag around to the front side, repeat steps about to make
second handle.


Pattern: Pink Version
Make 2
Ch 3, Sl St into the first Ch
Round 1: Ch 2, 12 Dc into the circle, Sl St to starting Ch (12)
Round 2: Ch 2, 2 Dc into each st, Sl St to starting Ch (24)
Round 3: Ch 2, 1 Dc into first st, *2 Dc in the next st, 1 Dc in the next st, repeat from
the * around the circle, Sl St to starting Ch (36)
Round 4: Ch 2, 1 Dc into the first two st, *2 Dc into the next st, 1 Dc into the next two
st, repeat from the * around the circle, Sl St to starting Ch (48)
Round 5: Ch 2, 1 Dc into the first three st, *2 Dc into the next st, 1 Dc into the next
three st, repeat from the * around the circle, Sl St to starting Ch (60)
Round 6: Ch 2, 1 Dc into the first four st, *2 Dc into the next st, 1 Dc into the next
four st, repeat from the * around the circle, Sl St to starting Ch (72)
Round 7: Ch 2, 1 Dc into the first five st, *2 Dc into the next st, 1 Dc into the next five
st, repeat from the * around the circle, Sl St to starting Ch (84)


Attaching: (If making 2 for a stronger base) if not skip to round 9
Hold both circles with wrong sides facing each other. Attach green yarn with a Sl
St.


Round 8: Ch 1, Sc around making sure to pick up both loops on both circles. Sl St
to starting Ch (84)


Next you will be working up the sides of your bag.


Round 9: Ch 2, 1 Dcblo in each st around, Sl St to starting Ch (84)
Rounds 9-26: Ch 2, 1 Dc in each st around, Sl St to starting Ch (84)

Tote Bag Handles:
Now tie off yarn!
Lay your bag flat with the back of your bag facing towards you,
center starting stitch in the middle.
Place stitch markers (one on the right side, one on the left) of your bag, evenly
placed! Now attach new color yarn (or yarn color of your choice) to the right side
of your bag.


Attach yarn and Ch 2,


Round 27: 1 Dc in each st around, 2 Dc in final st, sl st to beginning ch (85)
Round 28: Ch 2, 1 Dc in first st, 1 Dc in next 14 sts, Ch 12, skip 12 stitches (to create
your first handle). 1 Dc into the 13th st over, 1 Dc into the next 29 sts, Ch 12, skip 12
sts (this will create the 2nd handle), 1 Dc in the 13th st over, 1 Dc into the next 15 sts,
sl st into beginning Ch (85).
Round 29: Ch 2, 1 Dc in each st around, including each set of 12 ch, sl st to
beginning Ch (85).
Rounds 30-31: Ch 2, 1 Dc in each st around, sl st to beginning Ch (85).


Tie Off and Weave In Your Ends!


Crochet Case Pattern


(Note: Ch 2 never counts as a stitch, you can use any color combination, I usually
like it to match my bag).


To Start: Ch 3, sl st into beginning ch.
Round 1: Ch 2, 12 Dc in the circle, sl st into beginning Ch (12).
Round 2: Ch, 2 Dc in each st around, sl st into beginning Ch (24).
Round 3: Ch, 1 DcBlo in each st around, sl st into beginning Ch (24).
Rounds 4 – 14: Ch 2, 1 Dc in each st around, sl st into beginning Ch (24).
Rounds 15-18: Ch 2, 1 Dc in each st around, sl st into beginning Ch (24).


Tie Off and Weave In Your Ends!


Drawstring Closure:
With yarn color of your choice: use three strands of worsted 4 weight acrylic yarn
around 60 inches in length. Start from the front center of your bag, 2nd row from
the top of your bag, weave the three strands of yarn held together in and out in
between 2 stitches at a time around the case.


I like to add pony beads to my yarn strands for an extra touch. You can also use
letter or decorative beads. I triple knot my strands below the beads or without the
beads to secure the strands. Make sure your drawstring is even all around your
bag, and trim to your liking.


Sew in ALL of your ends!


Thank you SO much for choosing to make my pattern. I hope that you enjoy making it!
Thank you so much for all of your love and support with my work! Please
contact/reach out to me at allyarnedup83@gmail.com or on Instagram
@all.yarned.up if you have any questions or need help with this pattern. If you
post finished pictures of your project on Instagram please tag me so that I can
see! Thank you!
Have a Wonderful Day!

Your Friend, Taralynn Dulo
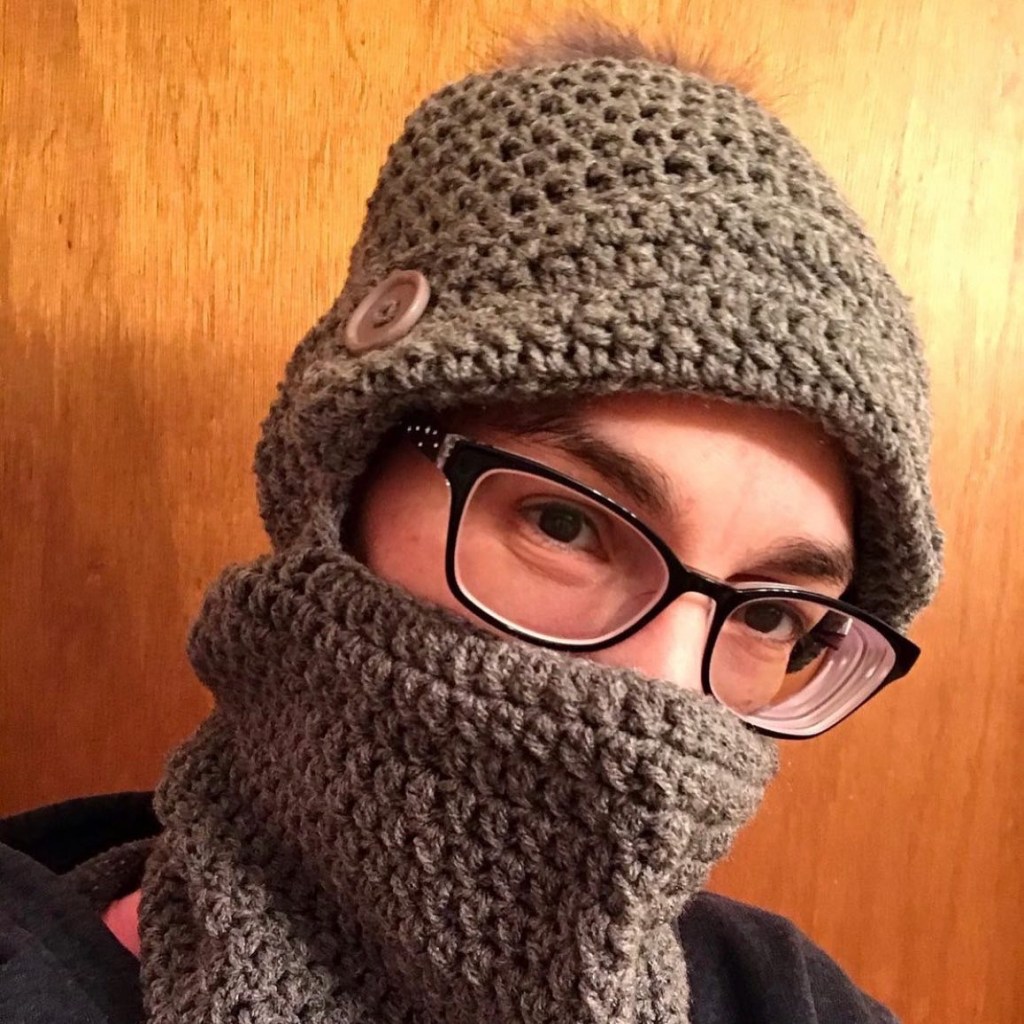
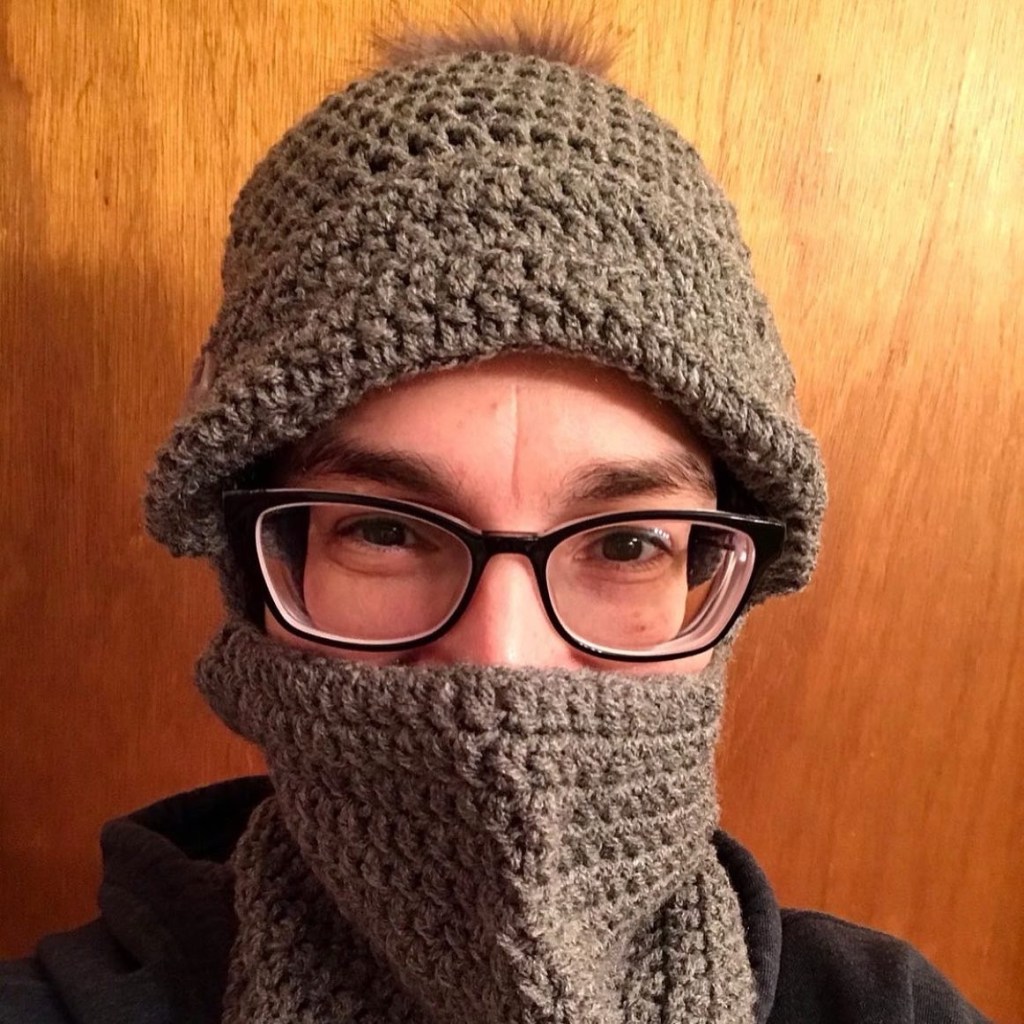
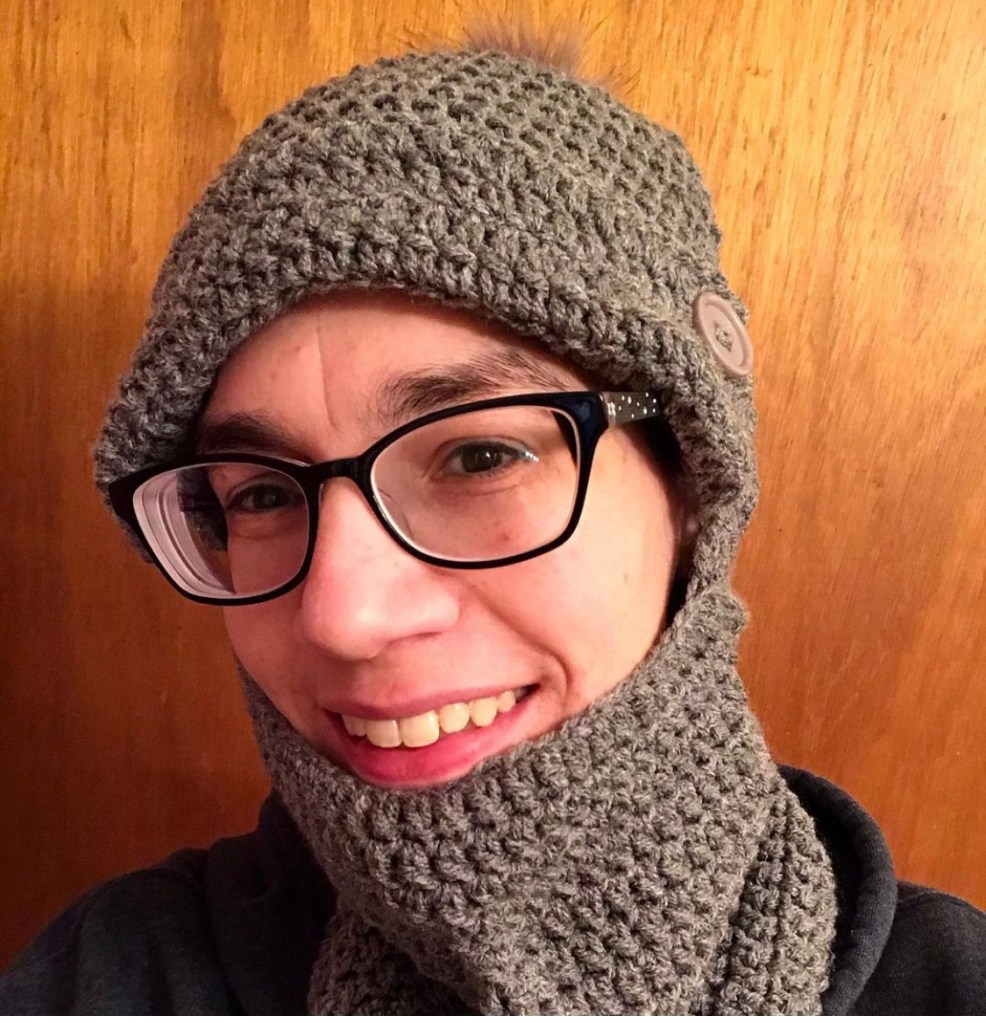
Crochet Beanie With Neck Warmer
Pattern by :Taralynn Dulo

Materials Needed
* Size J or 5.75mm Crochet Hook (For Bigger Hat Size, Use Size K or 6.5mm Crochet Hook)
* Worsted 4Weight 100% Acrylic Yarn
 * (oneskein of worsted 4 weight yarn (ex. Big twist value, Redheart
Supersaver, etc. if you use variegated you may need two skeins of
yarn)
* Scissors
* Tapestry Needle
* Measuring Tape
* Stitch Markers
* 1 Inch Buttons (2)
* SnapOn/Removable PomPom

Stitch Abbreviations
* Ch–Chain                                                                                                                        * St - Stitch
* Sl St – Slip Stitch
* Dc – Double Crochet

Notes:
* Ch2 at the start of each row does not count as a stitch
* Crochet pattern written in U.S. Terms
* Pattern is worked from the top of the hat down
* Stitch counts are at the end of each row
* I recommend using stitch markers for this project


Measurements (Approximate):
* Length (Top of Hat to Bottom):16 inches.
* Width (Measurements left to ride side of hat when finished):10 inches.


Pattern:
Ch 3, sl st into beginning st, Ch 2 or do Round 1 into a magic ring
Round 1: 12 Dc into the circle, sl st into beginning st, Ch2. (12)
Round 2: 2 Dc into each st around, sl st into beginning st, Ch2 (24)
Round 3: *1 Dc into the first st, 2 Dc into the next st, repeat from the *around, sl st
into beginning stitch, Ch2. (36)
Round 4: *1 Dc into the first 2 stitches, 2 Dc into the next st, repeat from the *
around, sl st into beginning stitch, Ch2. (48)
Round 5: *1 Dc into the first 3 stitches, 2 Dc into the next st, repeat from the *
around, sl st into beginning stitch, Ch2. (60)
Rounds 6-17: 1 Dc into each st around, sl st into beginning st, Ch2. (60)
Round 18: 1 Dc into the first 22 stitches, Ch 24, skip over 24 stitches, 1 Dc into
the 25th st, 1 Dc into the next 13 stitches, sl st into beginning st, Ch2. (60)


**The total stitch count for round 18 includes the 24 Ch stitches!**

Round 19: 1 Dc into each st around, (including 1 Dc into the 24 Ch stitches), sl st
into beginning st, Ch2. (60)
Rounds 20-32: 1 Dc into each st around, sl st into beginning st, Ch2. (60)
Round 33: 1 Dc into each st around, sl st into beginning st, (60)


Tie off!

Hat Flap With two 1 inch buttons (optional):


With your hat laying down, facing you right side up, attach yarn in first st, top right of eye opening part, Ch2 (does not count as stitch)


Rows 1-4: 1 Dc into the 24 stitches across, Ch 2 (24)


Tie off, and weave in your ends.


Attach/sew two 1 inch buttons to hold your flap back.


To finish the hat, attach Pom Pom to the top of the hat, if desired.


Make sure to weave and sew in all of your ends to finish.

Thank you so much for choosing to make my crochet pattern. I hope that you enjoy
making it! Thank you so much for all of your love and support of my crochet work.
Please feel free to contact me/reach out to me at allyarnedup83@gmail.com or
My Instagram @all.yarned.up if you have any questions, need help with the
pattern, or just have any general questions about crochet. If you post pictures of your finished crochet projects of mine, please tag me so that I can see and share them.


Have a wonderful day and Happy Crocheting!


Your Friend, Taralynn Dulo
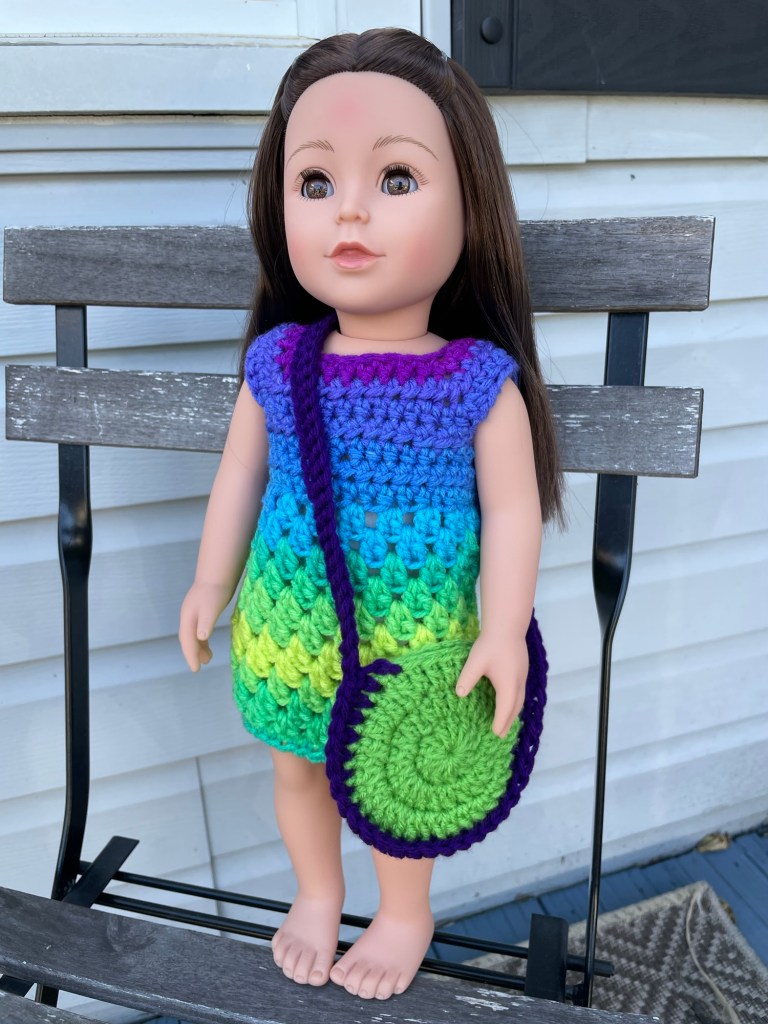
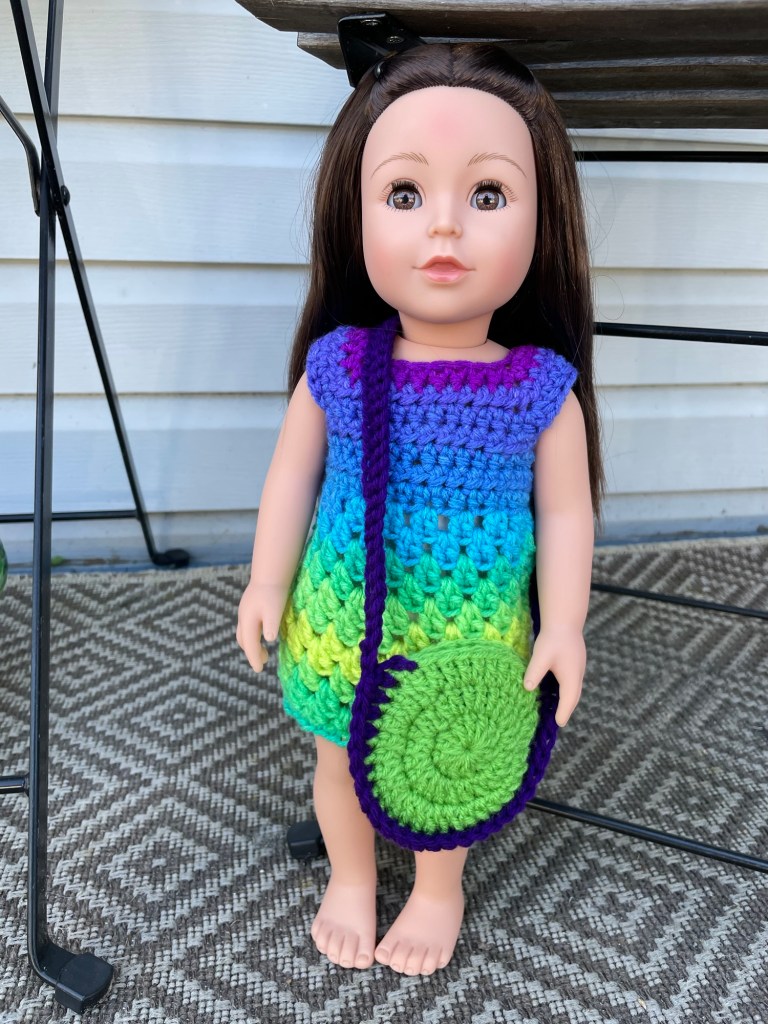
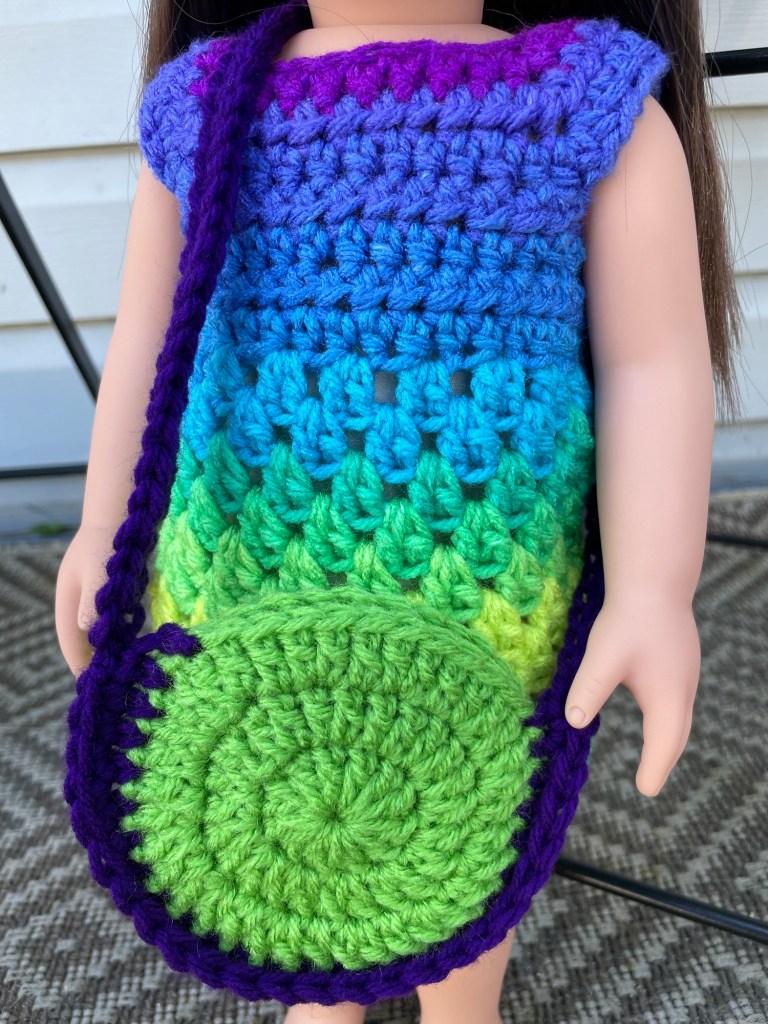

18 Inch Crochet Round Doll Purse
Pattern by:Taralynn Dulo

Materials Needed:
* Size H or 5.00mm crochet hook
* Worsted Weight Yarn (size 4)
* Scissors
* Tapestry Needle
* Measuring Tape
* Stitch Markers
Optional Materials:
* Beads, Buttons, Tassels for decorative purposes


Stitch Abbreviations
* Ch - chain                                                                                                                        * St - Stitch
* Sl St - Slip Stitch
* Sc - Single Crochet
* Dc - Double Crochet


Notes
* Chain two to start each round never counts as a stitch
* Bag is worked from the bottom up
* Written in U.S. Terms
* Stitch counts are at the end of each round
* I recommend using a stitch marker to mark the start of each round


Measurements:
* 2 Crochet Circles (Width) 3 ½ Inches
* Purse Length (Approximate) 9 ½ Inches


Pattern: (make 2)
Chain 3, Sl St to the starting Ch st in order to form a circle, Ch 2
Round 1: 12 Dc in the circle, Sl St to starting Ch, Ch 2 (12)
Round 2: 2 Dc in each St around, Sl St to starting Ch, Ch 2 (24)
Round 3: *1 Dc into the first st, 2 Dc into the next st, repeat from the * around, Sl St
to starting Ch, tie off (36)


Leave Tails!


Holding both circles with tails lining up and the insides of your circles facing each
other (I hold my tails in as I’m crocheting, then cut off the ends.)


Attach Yarn with Sl St, Ch 1, Sc around (26) (you should have 10 extra stitches for
the purse opening) Chain 60,


Round 1: (while making sure that your Ch isn’t twisted) Skip over 10 stitches to leave
an opening for your purse and Sc into the next St to join, Ch 1
Round 2: 1 Sc in each st including Ch stitches , all around your work, Sl St to the
starting Ch, tie off!


Weave In Your Ends!


ALL DONE!


Thank you so much for choosing to make my pattern! I really appreciate all of your support! Please contact/each out to me if you have any questio, need help with
the pattern, or if you have any general questions about crochet. My email is: allyarnedup83@gmail.com and my Instagram is @all.yarned.up. Please also share your finished items on My Instagram and please tag me so that I can see your creations!

Have a wonderful day, and Happy Crocheting!

Your Friend, Taralynn Dulo
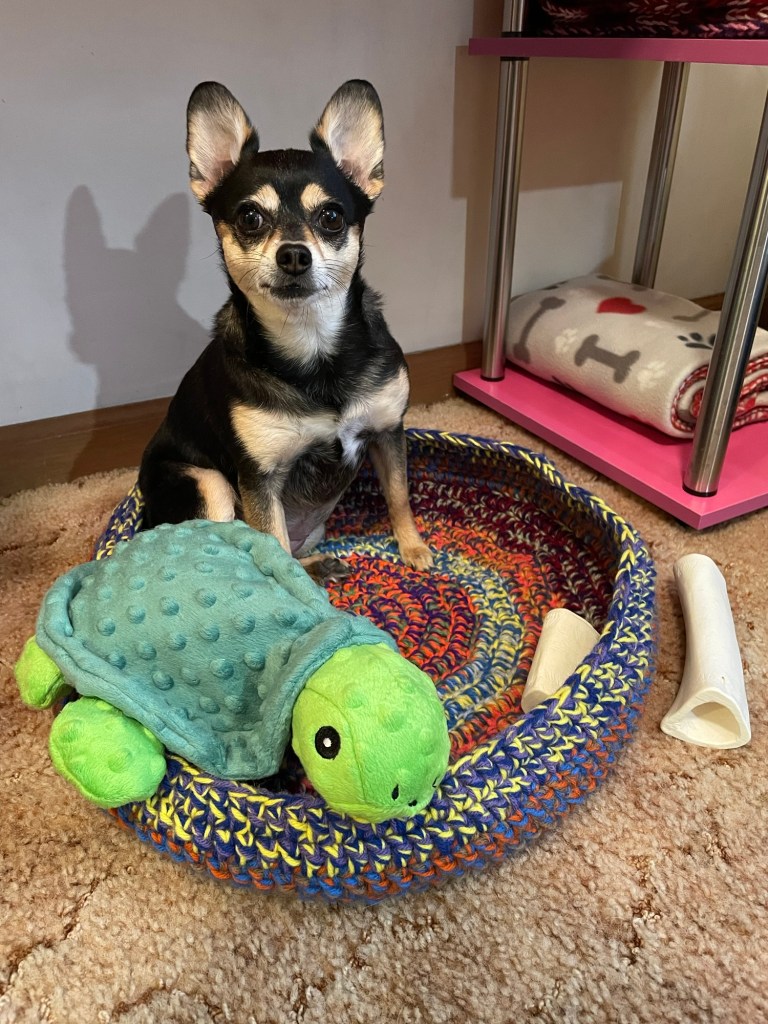
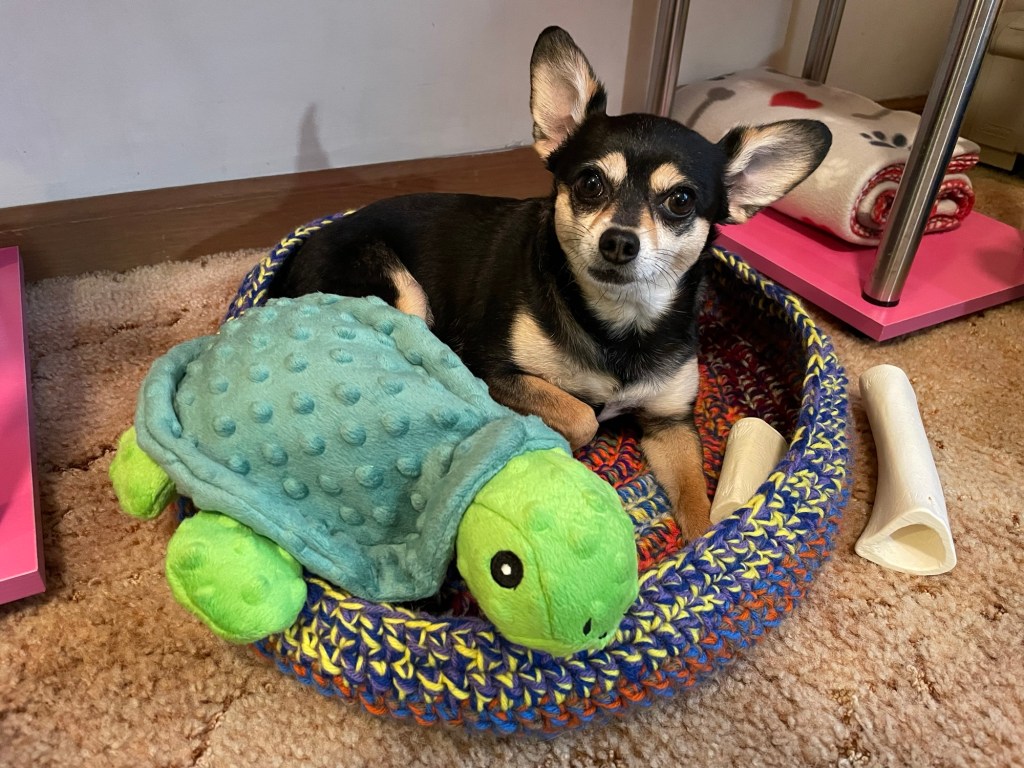
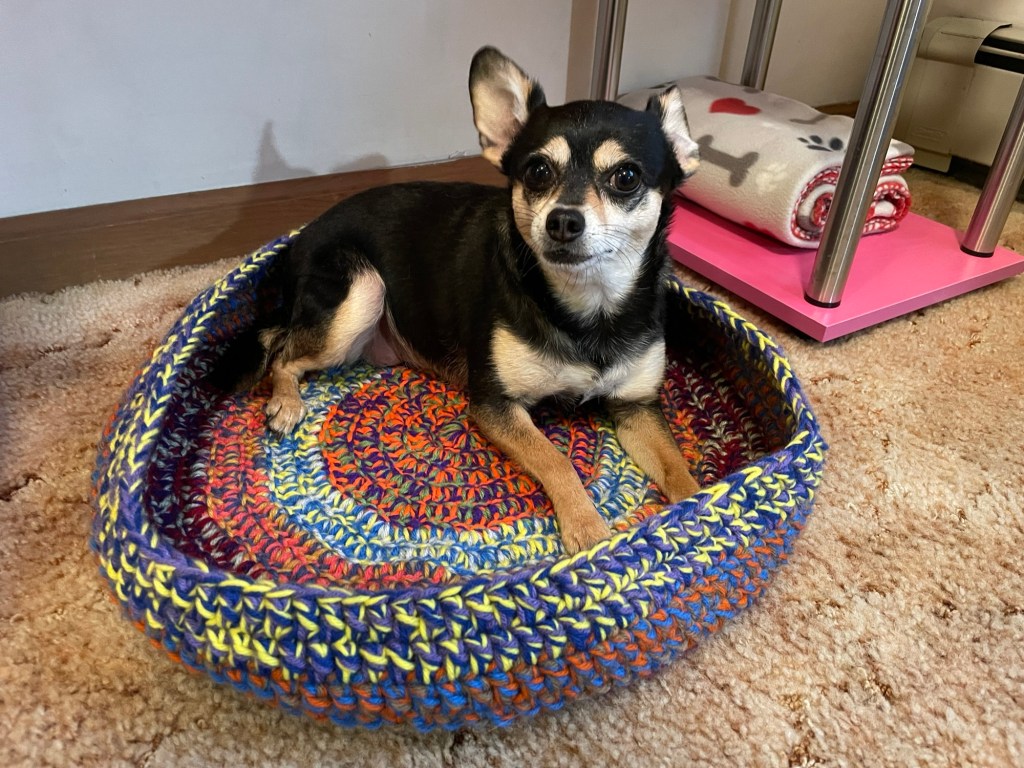

Crochet Small Dog, Cat Bed                                                                                 Pattern By: Taralynn Dulo

Materials Needed:
* Size K or 6.5mm crochet hook
* Worsted Weight Yarn (size 4)
 * I used scrap yarns for mine
* Scissors
* Tapestry Needle
* Measuring Tape
* Stitch Markers

Stitch Abbreviations
* Ch - Chain                                                                                                                       * St - Stitch
* Sl St - Slip St
* Dc - Double Crochet
* Dcblo - Double Crochet Back Loop Only

Finished Measurements:
* Small Dog/Cat Bed: Base 14 inches width, Sides 4 ½ inches tall
* My rescue chihuahua mix dog (for size reference) tip of nose to start
of tail – 20 inches, standing floor to top of back – 11 inches, weight
approximately a little over 9 lbs.

Notes
* Chain 2 never counts as a Stitch
* You can use any worsted 4 weight acrylic yarns
* Pattern is worked holding 3 strands of worsted 4 weight yarns together
* Stitches will be tightly stitched because the bed will loosen just a
little with time, three strands makes the bed more sturdy.

* (Side note – my chihuahua is rough with the bed, fluffing it, etc and it
has stayed perfectly in tact!)

* Bed is worked starting with the base, then working up the sides.

Pattern:
To Start, holding 3 strands of worsted 4 acrylic weight yarns together, Ch 3,
sl st into first St
Round 1: Ch 2, work 12 Dc into circle, sl st into first Dc to close (12)
Round 2: Ch 2, work 2 Dc into each st around the circle, sl st into first Dc to close (24)
Round 3: Ch 2, *work 1 Dc in the first St, 2 dc in the next St, repeat from the *
around the circle, sl st into first Dc to close (36)
Round 4: Ch 2, *work 1 Dc in the first St, 1 Dc in the next St, 2 Dc in the next
St, repeat from the * around the circle, sl st into first Dc to close (48)
Round 5: Ch 2: *work 1 Dc in the first St, 1 Dc in the next 2 St, 2 Dc in the next
St, repeat from the * around the circle, sl st into first Dc to close (60)
Round 6: Ch 2, *work 1 Dc in the first St, 1 Dc in the next 3 St, 2 Dc in the next
St, repeat from the * around the circle, sl st into first Dc to close (72)
Round 7: Ch 2, *work 1 Dc in the first St, 1 Dc in the next 4 St, 2 Dc in the next
St, repeat from the * around the circle, sl st into first Dc to close (84)
Round 8: Ch 2, *work 1 Dc in the first St, 1 Dc in the next 5 St, 2 dc in the next
St, repeat from the * around the circle, sl st into first Dc to close (96)
Round 9: Ch 2, *work 1 Dc in the first St, 1 Dc in the next 6 St, 2 Dc in the next
St, repeat from the * around the circle, sl st into first Dc to close (108)
Round 10: Ch 2, *work 1 Dc in the first St, 1 Dc in the next 7 St, 2 Dc in the
next St, repeat from the * around the circle, sl st into first Dc to close (120)
Round 11: Ch 2, 1 Dcblo in each St around the circle, sl st into first Dc to
close (120)
Round 12-16: Ch 2, 1 Dc in each St around the circle, sl st into first Dc to
close (120)

You can add more rows here if you want the sides of your pet bed taller, my
rescue chihuahua dog seems to like this height, she can get in and out
easily.

Sl St, Tie Off, and Weave In Your Ends!

Thank you so much for choosing to make my pattern. I hope that you enjoy
making it! Thank you so much for all of your love and support of my work.
Please contact/reach out to me at allyarnedup83@gmail.com or on
instagram @all.yarned.up if you have any questions or need help with the pattern.

Have a Wonderful Day and Happy Crocheting!

Your Friend, Taralynn Dulo
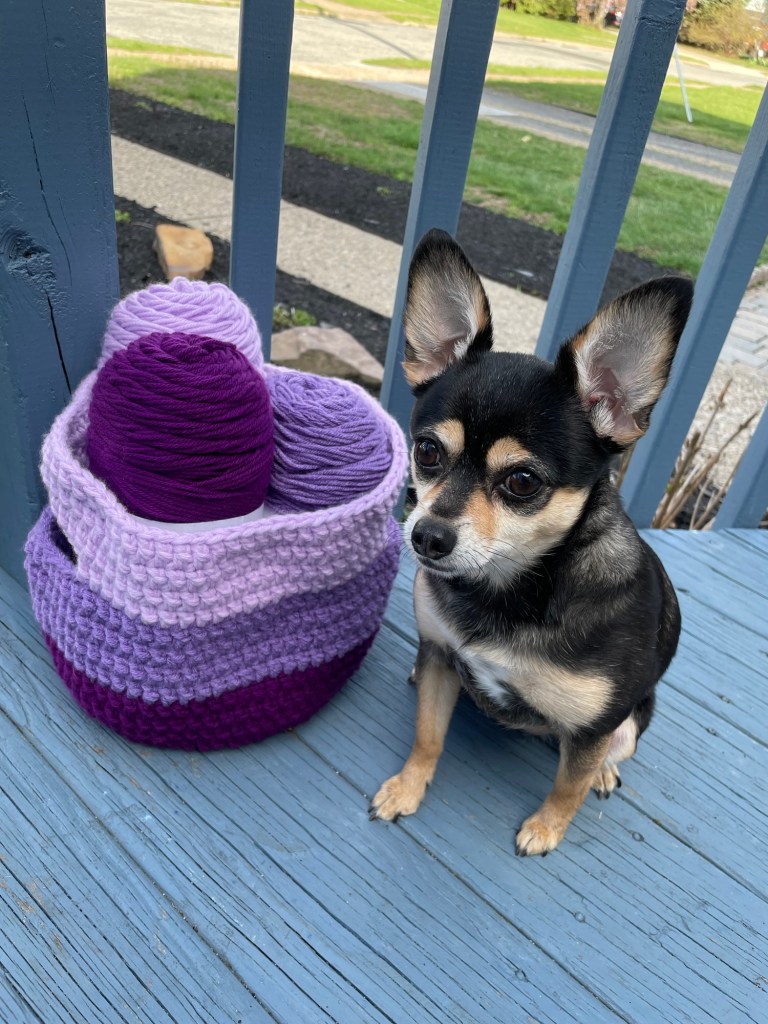
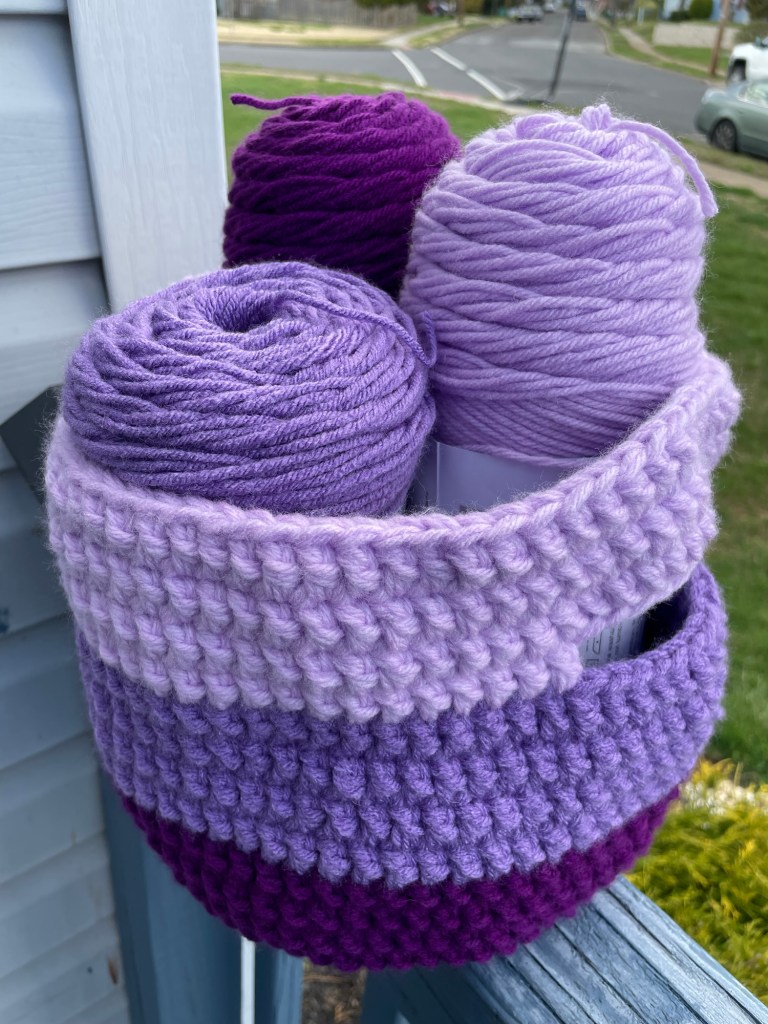
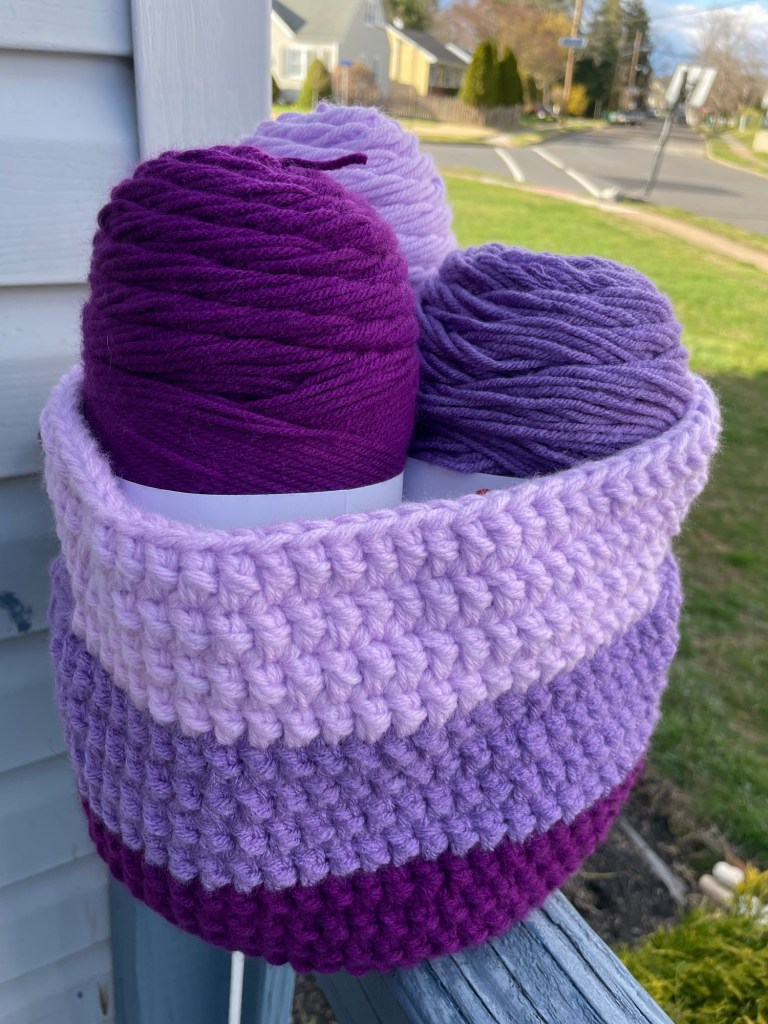
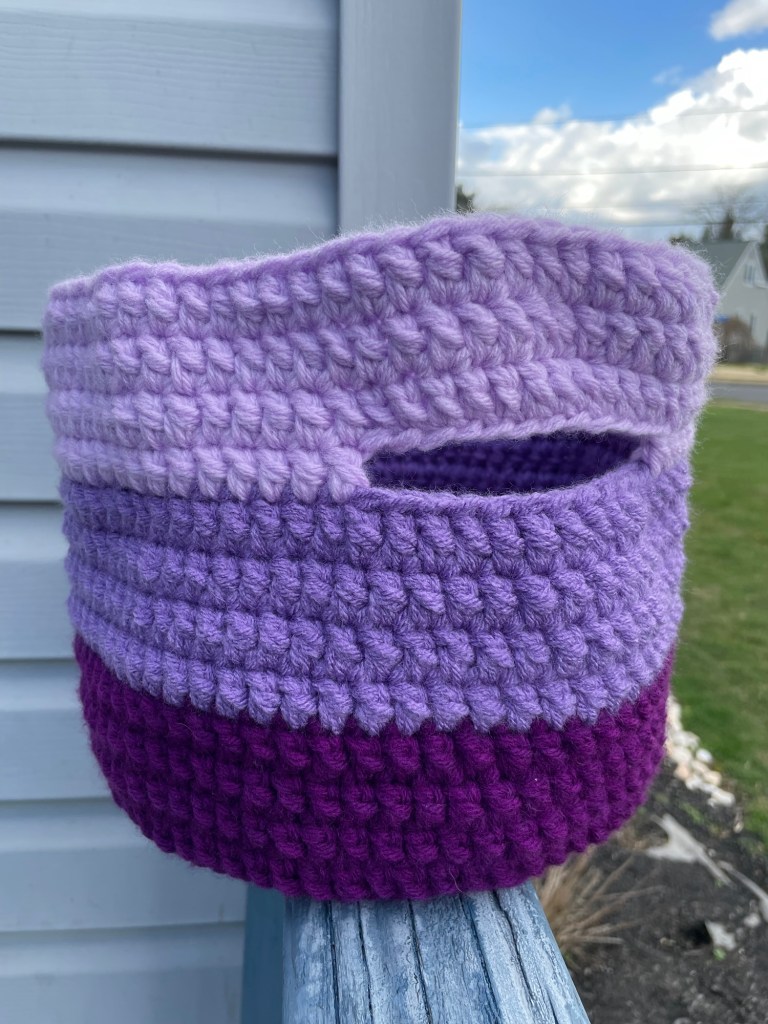
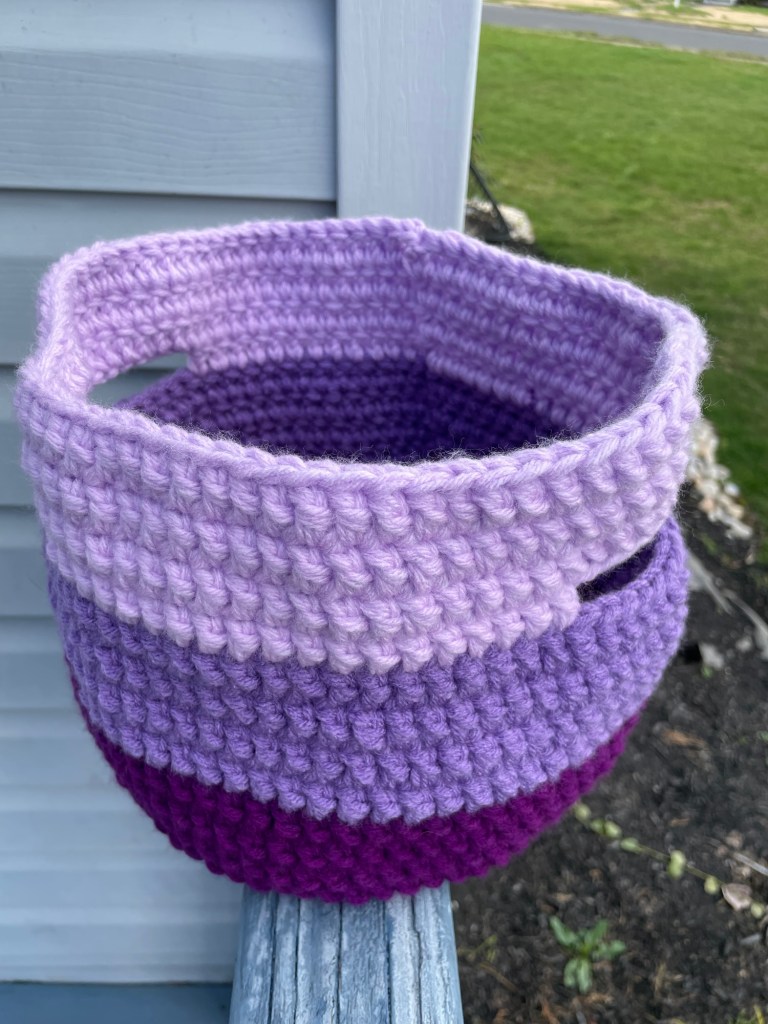
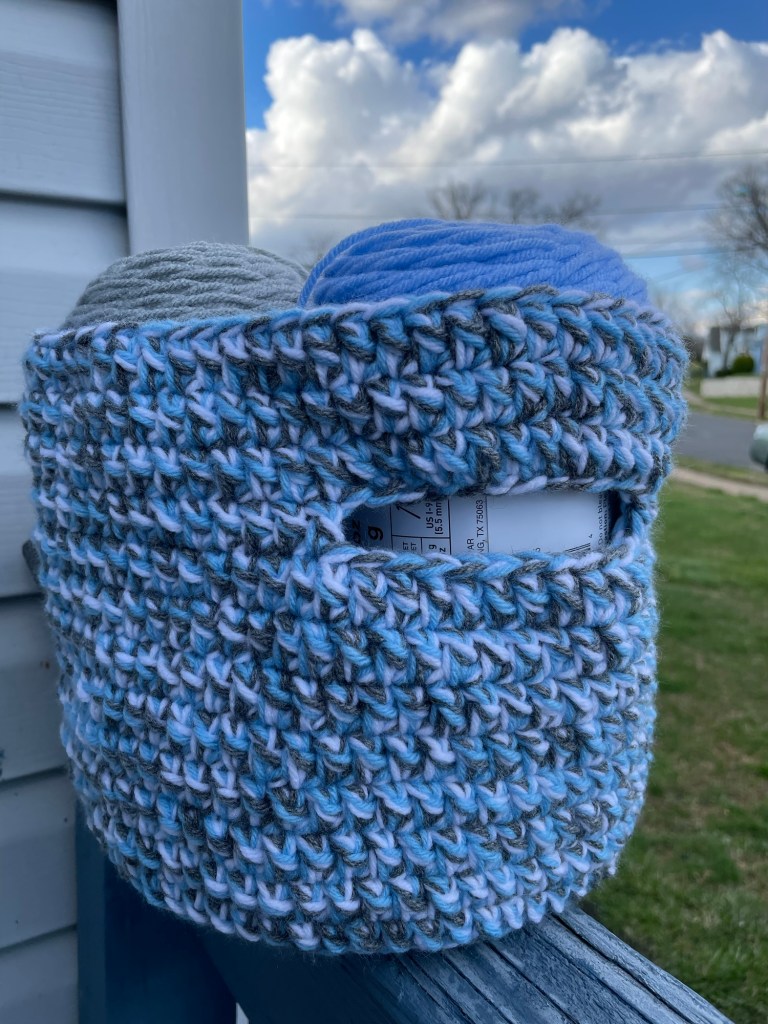
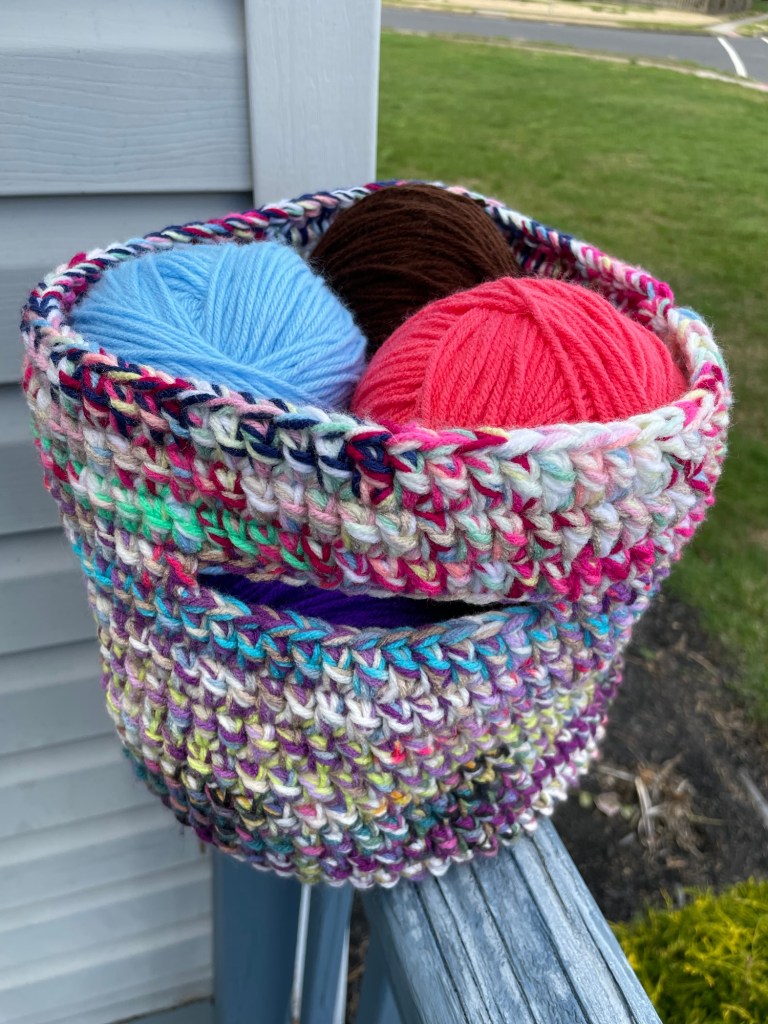
Crochet 3 Tone Basket
Pattern by: Taralynn Dulo
Materials Needed:
* Size K or 6.5mm crochet hook
* Worsted Weight Yarn (size 4)
* I used these colors but feel free to use any worsted weight yarn:
* Joanns Big Twist Value in the ColorWay Purple
* Michaels CraftSmart Value Yarn in the ColorWay Amethyst,
* Joanns Big Twist Value Yarn in the ColorWay Soft Purple
* Scissors
* Tapestry Needle
* Measuring Tape
* Stitch Markers
Stitch Abbreviations
* Ch – chain * St – Stitch
* Sl St – Slip Stitch
* Dc – Double Crochet
* Dcblo – Double Crochet Back Loop Only
Finished (approximate) Measurements of Basket: * base width 8 1/2 inches and base to the top of basket 8 inches
Notes * You can make basket following this pattern also using scrap yarns,
all solids, or any worsted 4 weight yarns of your choice (di erent
option are shown in pictures)
* Chain two to start each round never counts as a stitch
* Basket is worked starting with the base, then working up the sides.
* Basket is worked holding three strands of worsted 4 weight yarns
together
* Stitches will be tight since using a K Hook but I like to make my
baskets tightly stitched because most likely basket will loosen some
as you use and makes basket more sturdy (in my opinion)
* Start pattern with darkest of the purple shades (or whatever color
you’re using)
Pattern:
Darkest Color To Start: Ch 3, Sl St into the first chain
Round 1: Ch 2 (never counts as a stitch) 12 Dc in circle, sl st into first Dc to
close (12)
Round 2: Ch 2, *1 Dc in the first st, 2 Dc in the next st, repeat from the *
around the circle, sl st into first Dc to close (24)
Round 3: Ch 2, *1 Dc in the first st, 1 Dc in the next st, 2 Dc in the next st,
repeat from the * around the circle, sl st into first Dc to close (36)
Round 4: Ch 2, *1 Dc in the first st, 1 Dc in the next 2 st, 2 Dc in the next st,
repeat from the * around the circle, sl st into first Dc to close (48)
Round 5: Ch 2, *1 Dc in the first st, 1 Dc in the next 3 st, 2 Dc in the next st,
repeat from the * around the circle, sl st into first Dc to close (60)
Round 6: Ch 2, *1 Dc in the first st, 1 Dc in the next 4 st, 2 Dc in the next st,
repeat from the * around the circle, sl st into first Dc to close (72)
Round 7: Ch 2, (THIS ROW WILL BE WORKED IN THE BACK LOOP ONLY!) 1
Dcblo in each st around the circle, sl st into first Dc to close (72)
Rounds 8 – 10: Ch 2, 1 Dc in each st around the circle, sl st into first Dc to close (72)
Change to 2nd ColorWay (Medium color)
Round 11: With 2nd color, attach, Ch 2, 1 Dc in each st around the circle, sl st
into first Dc to close (72)
Rounds 12-14: Ch 2, 1 Dc in each st around the circle, sl st into first Dc to
close (72)
Change to 3rd ColorWay (lightest color)
Round 15: Ch 2, 1 Dc in the first stitch, 1 Dc in the next 11 st, Ch 12, Dc in the
13th st over, 1 Dc in the next 23 st, Ch 12, dc in the 13th st over, 1 Dc in the next
11 st, sl st into first Dc to close (72 including Ch 12)
Round 16: Ch 2, 1 Dc in each st around the circle including the ch 12 spaces,
sl st into first Dc to close (72)
Rounds 17-18: Ch 2, 1 Dc in each st around the circle, sl st into first Dc to
close (72)
Tie off and weave in your ends!
Thank you so much for choosing to make my pattern. I hope that you enjoy
making it! Thank you so much for all of your love and support of my work.
Please contact/reach out to me at allyarnedup83@gmail.com or on
instagram @all.yarned.up if you have any questions or need help with the
pattern.
Have a Wonderful Day, and Happy Crocheting!
Your Friend, Taralynn Dulo
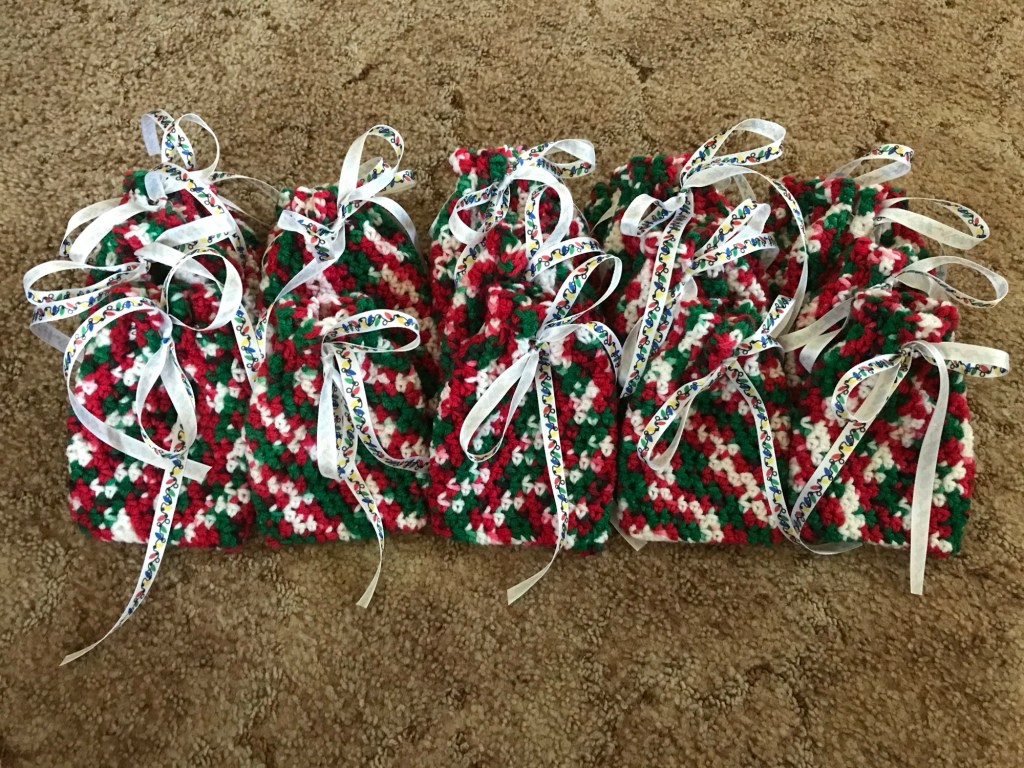
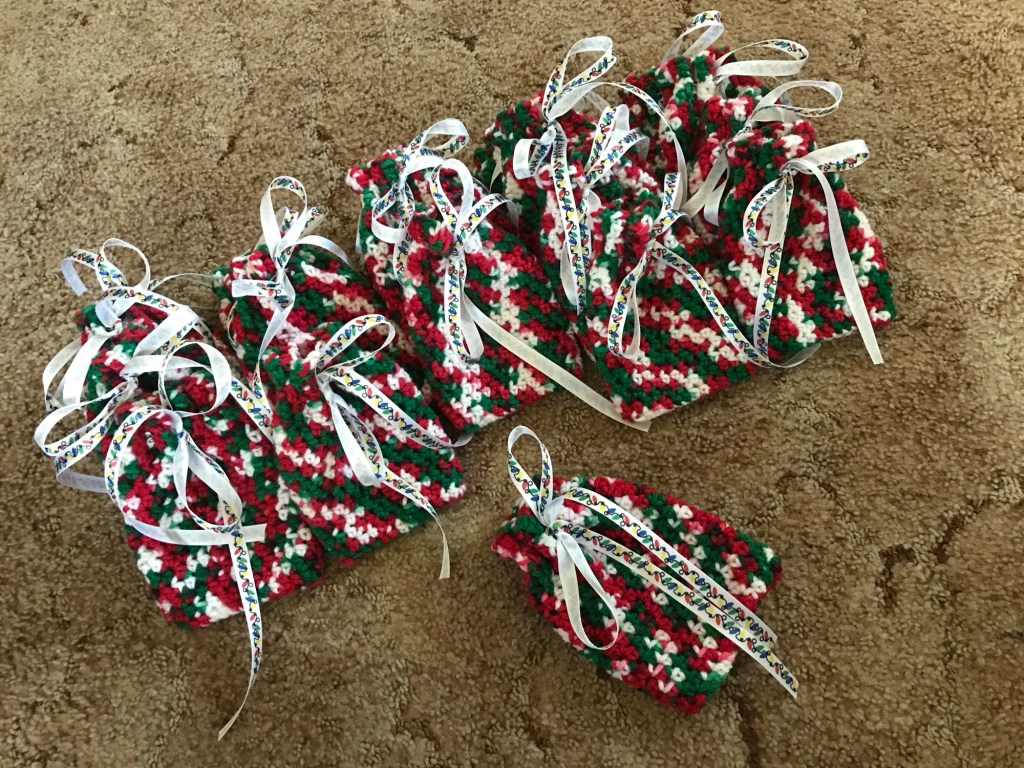

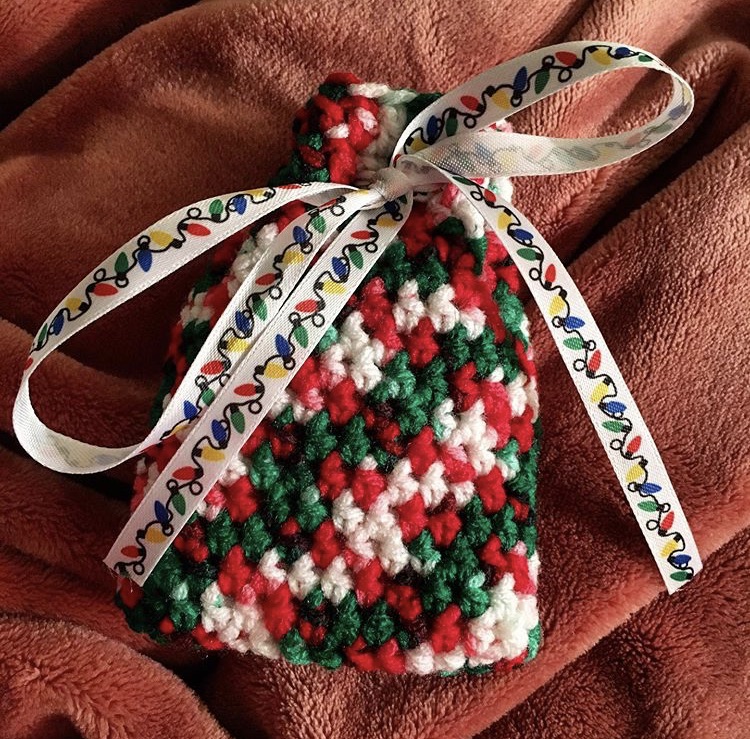
Crochet Favor Bag
Pattern by: Taralynn Dulo

Materials Needed:
* Size I or 5.25mm crochet hook
* Worsted Weight Yarn (size 4)
* Thin Ribbon
* Scissors
* Tapestry Needle
* Measuring Tape
* Stitch Markers                                                                                                    Optional Materials:
* Beads, Tassels, Charms for decorative purposes

Stitch Abbreviations
* Ch - chain                                                                                                                        * St - Stitch
* Sl St - Slip Stitch
* HDC - Half Double Crochet
* Dc - Double Crochet

Notes
* Chain two to start each round never counts as a stitch
* Bag is worked from the bottom up
* Written in U.S. Terms
* Stitch counts are at the end of each round
* I recommend using a stitch marker to mark the start of each round

Pattern:
Chain 28, Sl St to the starting Ch st in order to form a circle, Ch 2 (28)
Round 1: 1 HDC in each st around, Sl St to starting Ch, Ch 2 (28)
Rounds 2-14: 1 HDC in each st around, Sl St to starting Ch, Ch 2 (28)
Round: 15: 1 Dc in each st around, Sl St to starting Ch, Ch 2 (28)
Round 16: 1 Dc in each st around, Sl St to starting Ch, tie off!

Weave in ALL of your ends.

Ribbon Placement:

In the second row down, from the top of your bag, use thin ribbon or a few
strands of yarn held together, starting from the front center of your bag, weave
ribbon or yarn in and out in between each stitch and meet back in the front of
your bag so you can make a bow in the front of your bag.

*Add Beads, Tassels, Charms to accessorize your favor bag if you’d like!*

Thank you so much for choosing to make my pattern! I really appreciate all of your support! Please contact/each out to me if you have any questions and or need help with
the pattern. My email is: allyarnedup83@gmail.com and my Instagram is
@all.yarned.up. Please also share your finished items on My Instagram
and please tag me so that I can see your creations!

Have a wonderful day, and Happy Crocheting!

Your Friend, Taralynn Dulo

